The following were put together by the various grade school and high school teachers participating in the graduate education course at Johnson’s Island. Groups of three or four students had the assignment to prepare one topic to include on this web site. Here are their contributions.
Screening
By: Niki Schiefer, Miranda Hessick and Kendra Foos
 Screening by definition is a course sieve used for sifting out fine particles. So you can imagine what mental picture we had concocted for the whole screening process. The typical kinds of images popped into our heads, like what you see on movies or television. A big elaborate set up with all kinds of different buckets and sorting systems was what we imagined. When in reality what we found on site was quite different. The screening process we encountered can be broken down quite simply into about five basic steps.
 Step 1: The Set Up of the Screen
Â
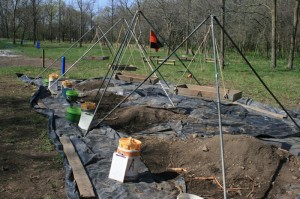
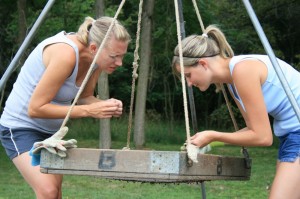
            This is the beginning step in your screening adventure. During this step you construct a tripod to which you attach your screening box. The screening box is simply that, a wooden box with screening for the bottom. The screening box is attached to the tripod by three ropes and a clasp to secure it to the top. The tripod is constructed in a selected location where the excavated remnants will be kept until the site’s excavation is completed and can be filled back in.
 Step 2: The Gathering of Excavated Material from Site into Buckets
          Excavating the material from the site is the most difficult step in this process, as we quickly discovered during this experience. It is done with a trowel and other small tool. You scrape away soil and other material from the selected site in even layers, being careful not to damage any artifacts you may be uncovering. The material that is scraped is collected with a scoop and placed into a bucket to be screened.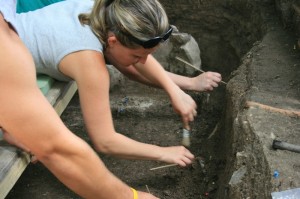
Step 3: Dumping the Excavated Material Bucket into the prepared Screen.
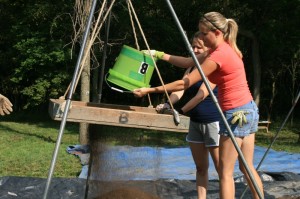
           Once you have filled your buckets with excavated material it is time to dump. Careful so not to spill your bucket, you dump your excavated material into the prepared screening tripod. It seems to work better if you have an extra set of hands to hold the screen while you dump your bucket. That way you are careful not to bump or dump your screen while you empty your excavated material.
              This step can be completed individually or with a partner. You simply shake the screen box back and forth to remove any loose soil from your excavated material. The soil will fall into a pile under your screen. The soil will remain here till the site is completely excavated and will be used to refill your work space. After you screen in this location for a while you may have to shovel a work spot so that your screen is easily accessed.
 Step 5: Sorting of the Excavated Material
            At this point you will, with one gloved hand, sort through the contents of your screen. You should carefully remove any large rocks, tree branches or roots from your screen. With your gloved hand, easily swipe the material in the bottom of your screen sorting out artifact. Some of the artifacts that we found were brick, nails, flint, glass, and bone. Also keep your eyes peeled for other civil war articles like hard rubber bits, ceramic, metal and other personal materials. Other items like Native American pottery, prehistoric, 19th century, geological and cultural pieces may be found in your screen as well. So patience is a virtue during this step in your screening process.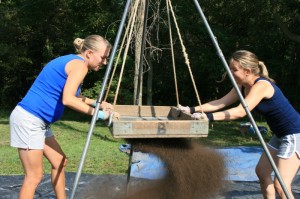
 During our week long experience on site we learned a lot of different information about what it takes to manage and maintain an excavation site. We have a new found appreciation for the archeologists who work every day to preserve our past history. So the next time you tour a history museum or view a display of artifacts take a moment to imagine what it took to excavate and locate those artifacts.
An Account of a Red ware Pipe Fragment
Ray Armstrong, Frances Cavotta, Pam Dreslinski, Jason Headman
            Redware pottery was first created by German immigrants settling in Pennsylvania in the late 17th century. It was the first pottery made in the American colonies. Redware was created from clays of different colors that burned to brick-red in kilns fueled by wood. Redware pottery was used for purposes as eating, drinking and even into smoking pipes. Â
            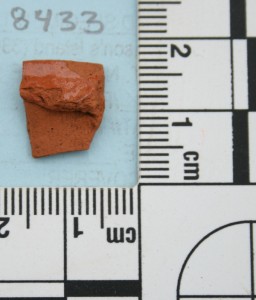 During the week at Johnson’s Island, our group found a piece of a redware smoking pipe (FS8433). We were in Unit C in Block 8 and found the piece during the screening process. Pieces of redware smoking pipes have been found previous to us being there. A redware smoking pipe, in its entirety, has also been found at this site on Johnson’s Island (see picture below). These pieces were a darker red in color.     Â
During the week at Johnson’s Island, our group found a piece of a redware smoking pipe (FS8433). We were in Unit C in Block 8 and found the piece during the screening process. Pieces of redware smoking pipes have been found previous to us being there. A redware smoking pipe, in its entirety, has also been found at this site on Johnson’s Island (see picture below). These pieces were a darker red in color.      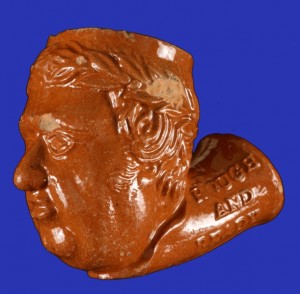
             Tobacco smoking was very common during the nineteenth century. President Zachary Taylor (1849-1850), and his wife Margaret Taylor were frequent pipe smokers. However, Margaret Taylor became ill from smoking and her husband was then forced to only smoke his cigar with male companions.  There are documents and letters illustrating that while making a decision, General Taylor at the time, would puff “vigorously†at his short pipe. Because of his continuous pipe smoking, the redware smoking pipe was made with “Rough and Ready†inscribed on it. “Old Rough and Ready†was President Zachary Taylor’s nickname in which he received because of his of his willingness to share his troops’ hardships.       Â
Pondering Lt. W. H. Peel
byHank, Drew, Shelia & Stacey
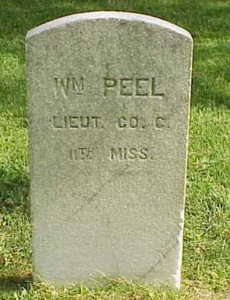  Lt. William H. Peel enlisted in the 11th Regiment Mississippi Infantry in August 1861 at the age of 23. After being captured at Gettysburg, Peel arrived at Johnson’s Island in late September 1863. Prior to his death at the prison on February 17, 1865, Peel spent time crafting items out of a hard rubber the prisoners called Gutta-percha.
 Hard rubber, patented in 1851, was used to make everyday items such as buttons, combs, and chart rulers. Having access to these common items, Peel crafted new items by carving the hard rubber, fashioning rings and watch chains among other items. He would then sell these new items to other prisoners or use them to barter for items such as clothing.
 The present-day search for hard rubber at Johnson’s Island is an exciting endeavor. Even more so this year, as we excavate Block 8. This block was home to Peel while he was imprisoned on Johnson’s Island. As we find hard rubber artifacts in Block 8, we cannot help but hypothesize. Did Peel make this ring? Was Peel the last one to touch this hard rubber artifact 145 years ago? The search has not only revealed items from the past, but also our curiosity about the past. FS8456 is a hard rubber chain link fragment recovered from Block 8.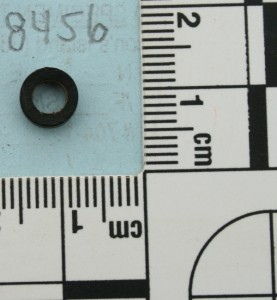
Â
Â
Â
Â


Dr. Bush, Marcia and fellow educators,
Nice job on your Field Reports! Thank You for inviting me out to the island to share my lessons with you. I will incorporate your reports into my 2010 -2011 lessons. I hope you get the opportunity to bring your students to Johnson’s Island.
Yours in Biology, History, Math, English, Music, Art, etc.,
Mark
Great job. Lots of information
Dr. Bush, Marcia and all other educators,
I am extremely interested in an entry level position. Anyone who knows of such a position reading this e-mail, please feel free to e-mail me. Please e-mail me to let me know where I may aquire a position with anyone interested in a hard-working 30 year old man in excellent health.
Sincerely, Richard Lott
@lowrider5140Â Yeah I noticed the glass is all scorched… That high of a heat setting defeats a lot of the purpose of having a vape. My buddha usually gets little yellow particles built up in the wand over time, but the glass never gets that typical burnt look. I keep the temperature dial between 12? to 2 but usually closer to 12
Yes! Thank You for inviting me out to the Island to share my lessons with you